Payment guide
Credit Card Payment Instructions
Pay by credit card after a one-time ID verification. Most accounts are approved within 60 seconds.
Last updated: April 26, 2026
How to pay
-
Sign in or create your account
You need an account to access the credit card payment option. Pick the path that applies to you.
New member
Create your account
Open the My Account page to register.
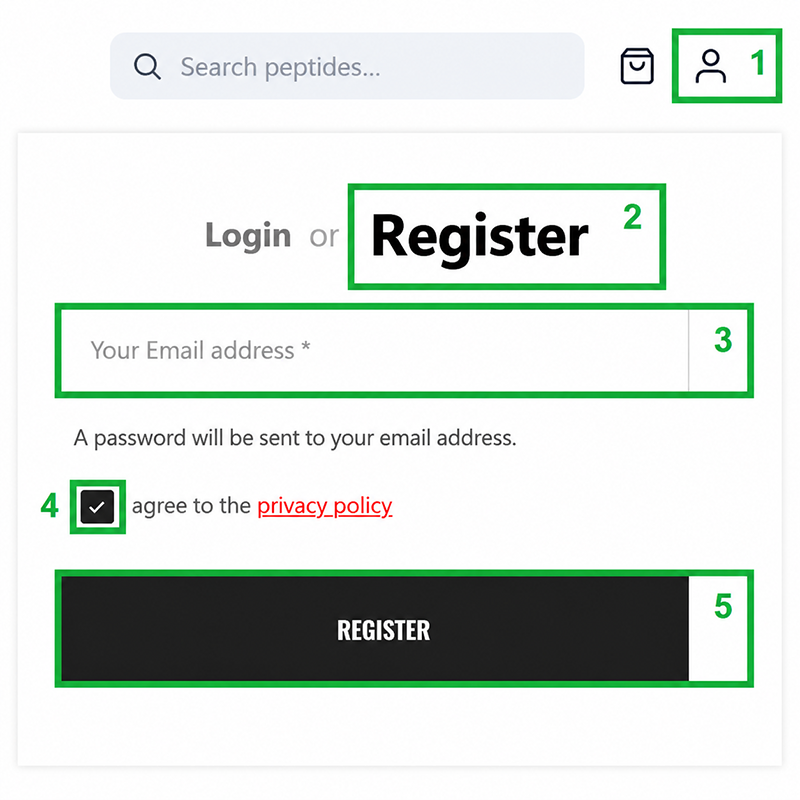
- Click the My Account icon in the top-right corner of any page.
- Click Register.
- Enter your email.
- Check the Privacy Policy box.
- Click Register to finish.
You’re redirected to your My Account dashboard.
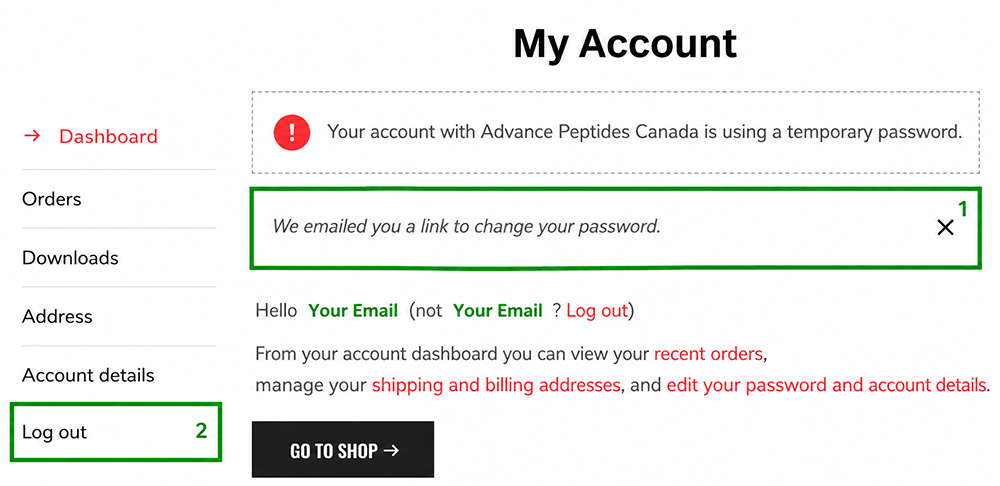
Set your password before you check out.
- We send a password reset link to the email you registered.
- Log out, then open your email.
- Click the link and create your password.
Skipping this blocks checkout. Once your password is set, log back in to activate your account.
Existing member
Log in
Open the My Account page to sign in.
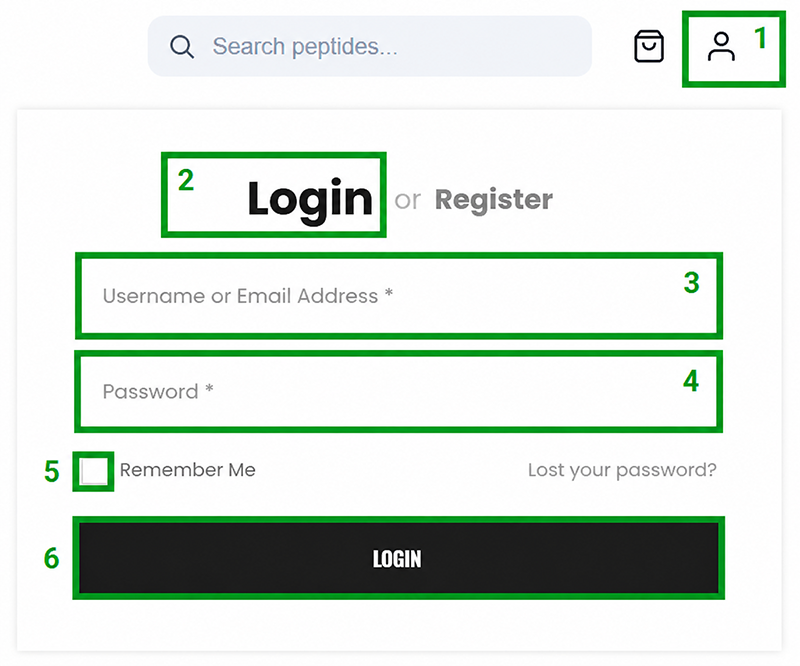
- Click the My Account icon in the top-right corner.
- Click Login.
- Enter your email and password.
- Check Remember Me to stay signed in next time.
- Click Login.
-
Add products and proceed to checkout
- Browse the store and add your items to the cart.
- When ready, click Checkout.
- On the checkout page, select Credit Card Payment as your payment method.
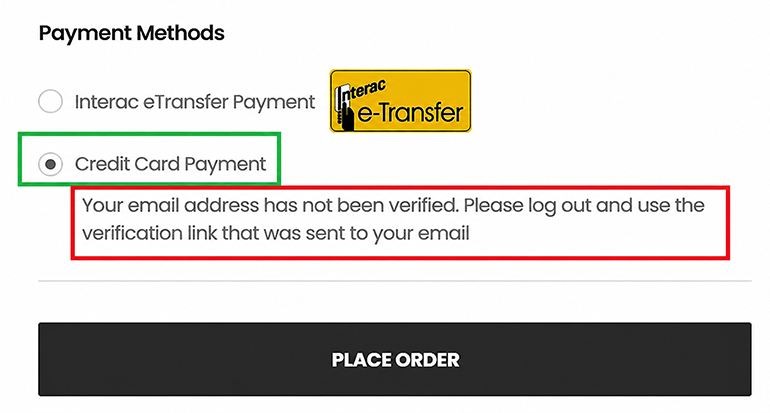
If you see “Your email address has not been verified”
- Log out and confirm you clicked the password reset link we sent when you registered.
- Log back in. The error clears once your account is fully activated.
-
Start ID verification
First-time credit card users need to verify their ID before the payment gateway unlocks.
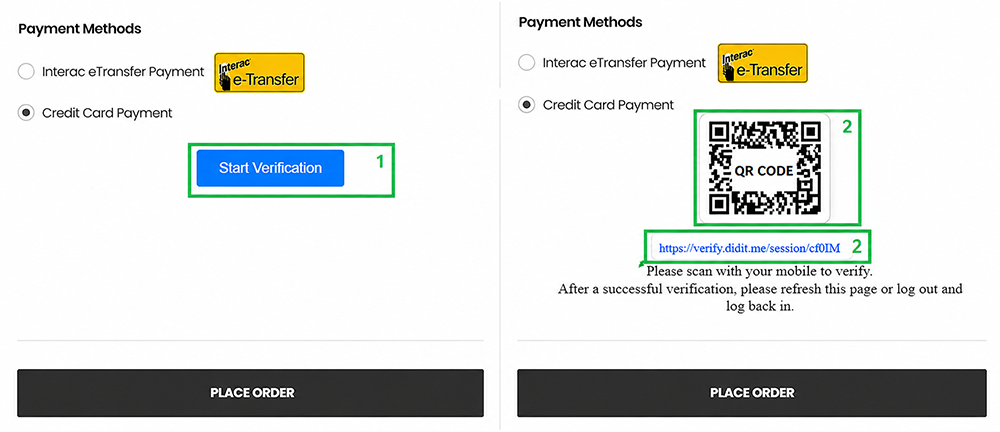
- Click Start Verification.
- We generate a unique QR code and link for your account.
- Scan the code with your phone or click the link to continue.
-
Complete Didit verification
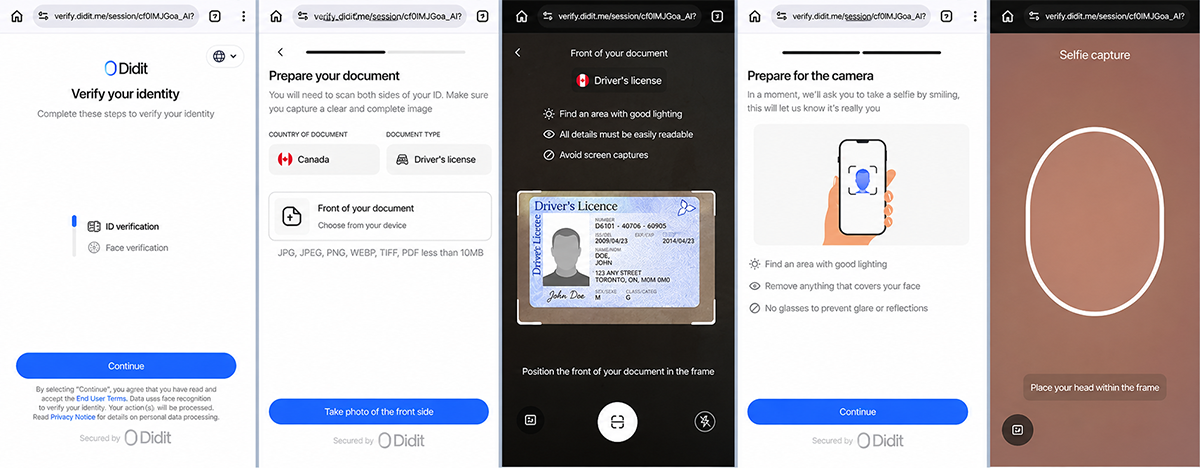
The verification flow has two parts:
- Photograph your driver’s license, front and back.
- Take a selfie.
-
Wait for the confirmation email
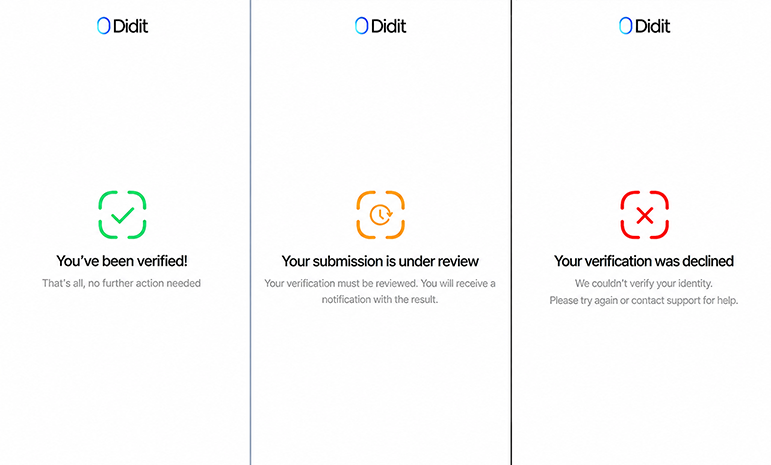
Most approvals come through in under 60 seconds. Some accounts need extra review and can take up to three business days.
When verification clears, we email you. The credit card option then appears at checkout.
- Refresh the page, or log out and back in, to see the credit card fields.
- No email? Check your spam folder. If you find it there, drag the message to your inbox so future updates land correctly.
Still no credit card option after verifying? Reach out via live chat or email and we’ll sort it.
-
Enter your credit card details
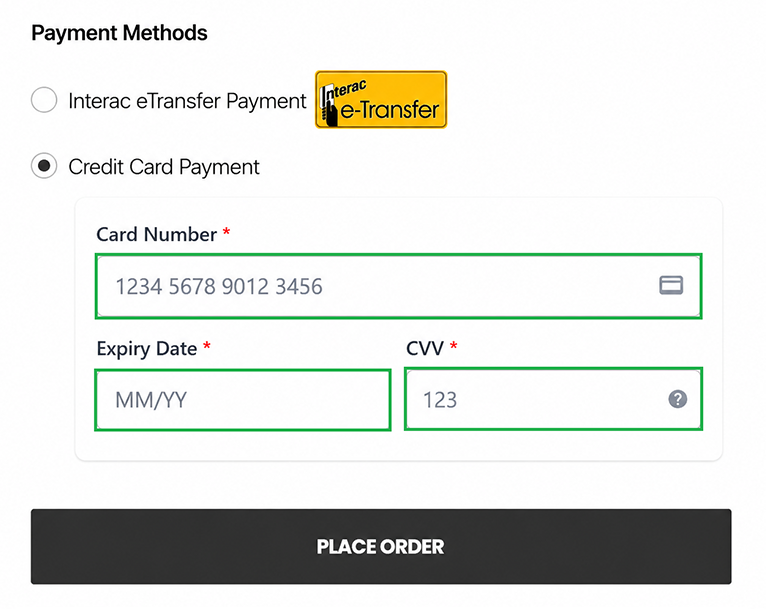
Verified accounts see the credit card option at checkout. To complete a purchase:
- Log into your account.
- Add items to your shopping cart.
- Go to the checkout page. The credit card gateway loads there.
Not seeing the credit card option? Contact us via live chat or email.
-
About your bank statement
Your charge won’t show “Advance Peptides” on your bank statement. We use a different billing descriptor to protect the transaction from being flagged or declined.
Your statement will show
AVU MANAGEMENT
Save this name with your order details to avoid disputes with your card provider later.
You’ll confirm this descriptor at the time of purchase.
Questions about the charge on your statement? Call 1-604-935-6687 or contact us directly.